+- Crimson Daggers — Art forum (//crimsondaggers.com/forum)
+-- Forum: STUDY GROUP (//crimsondaggers.com/forum/forum-5.html)
+--- Forum: COMMUNITY CHALLENGES (//crimsondaggers.com/forum/forum-46.html)
+--- Thread: Crimson CHOW #57 D&D Sports Star (/thread-9684.html)
Crimson CHOW #57 D&D Sports Star - CBinnsIllustration - 10-28-2024

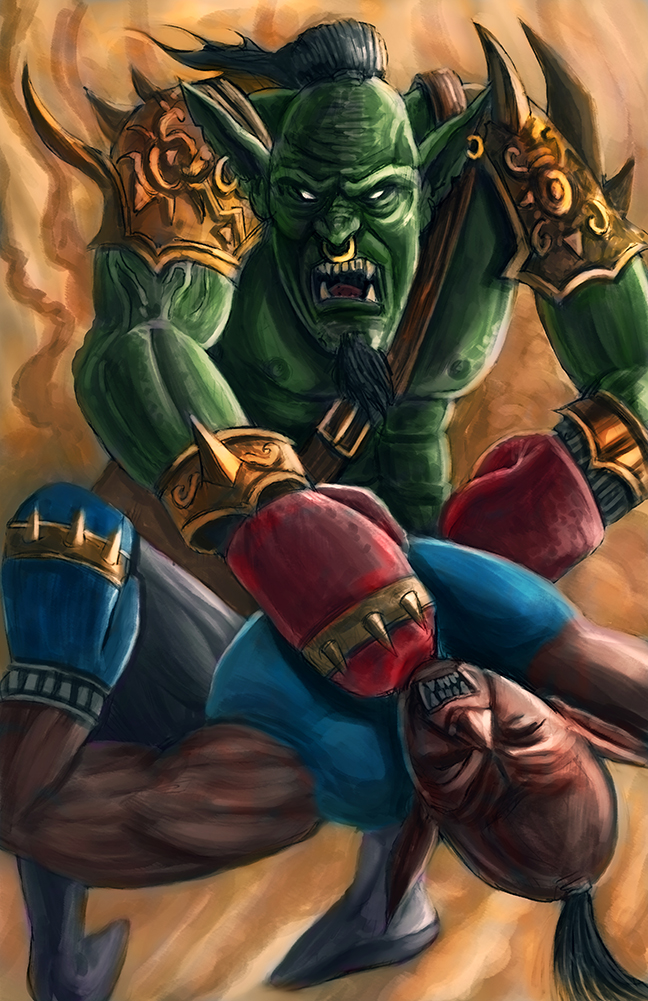
Illustration example by: Fajareka Setiawan
This week's theme and brief by previous winner, CBinnsIllustration
Crimson Character of the week #57
-=D&D Sports Star=-
In a world filled with adventure and with danger lurking around every corner, even heroes must find time for some good old sport. Orc, humans, elves and Halflings are but a few to put their differences aside for this one day, a day where all will be treated to his/her greatness. Whether gathered in crowded taverns, packed stadiums or eagerly peering through a magical portal, none would dare miss this moment. A star with such generational talents none can deny their spectacle and their ability to transcend species, with all their differences, if for only a few hours.
Design a super athlete that should live within the Dungeon and Dragons universe. Pick or create your species and pick or create your sport. Don’t hold back and create something fun. Action shot, or posed character sheet, anything goes on this one.
- Guidelines:
- No photograph paint overs, must be 100% original work. (See next rule for exception)
- 3D is permitted and renders MAY be used as whole or in part of a painting, as long as YOU created the work. Pre-made and/or purchased, online, assets are forbidden.
- AI may be used in the ideation process, but the final image must be 100% hand-drawn.
- Studies are recommended, but not required.
- There is no restriction on image formats (horizontal, vertical, square).
- Environment backgrounds are optional.
- Keep in mind you are not required to stick to what is in the passage. It is more of a guide in terms of mood.
- You must post at least one WIP in the WIP thread to be accepted into the final poll.
- Finals must be posted in the finals thread before the deadline.
- At least 3/4 of the character must be visible (minimum from the knees up).
- Only ONE submission per person in the finals thread.
- No fanart. We want to see your original, unique interpretations!
- Voting will be held for 5 days after the deadline.
- In an event of a tiebreaker, a winner will be chosen through a randomized name picker.
- No photograph paint overs, must be 100% original work. (See next rule for exception)
-+|| WIP THREAD ||
Deadline is Tuesday, November 28 @ UTC: 23:59
RE: Crimson CHOW #57 D&D Sports Star - Lege1 - 10-30-2024
CBinnsIllustration: Really great topic! Looking forward to rocking something for this no doubt. Hope all is well in your world. 100

RE: Crimson CHOW #57 D&D Sports Star - Lege1 - 11-18-2024

RE: Crimson CHOW #57 D&D Sports Star - CBinnsIllustration - 11-22-2024
Nice piece Lege! its been a hectic month for me and im still hoping to join in on this brief before the deadline. Hopefully we can get some folks joining in as well...but maybe everyone else is throttled down this month or perhaps its my fault for setting an uninspiring brief :-(
RE: Crimson CHOW #57 D&D Sports Star - Lege1 - 11-22-2024
CBinnsIllustration: The brief is definitely awesome in my strong opinion and I'm enjoying the topic lots as it has a lot of potential. Thanks and I'm glad you like what I have going so far. This was a big experimental piece and I have experimented with it more since my last post, playing with more traditional looks and feels in the digital work. It's honestly been a hectic month for me here as well and I'm hoping life can smooth out a little better for us all. Looking forward to what you come up with and just do your best as always man 100
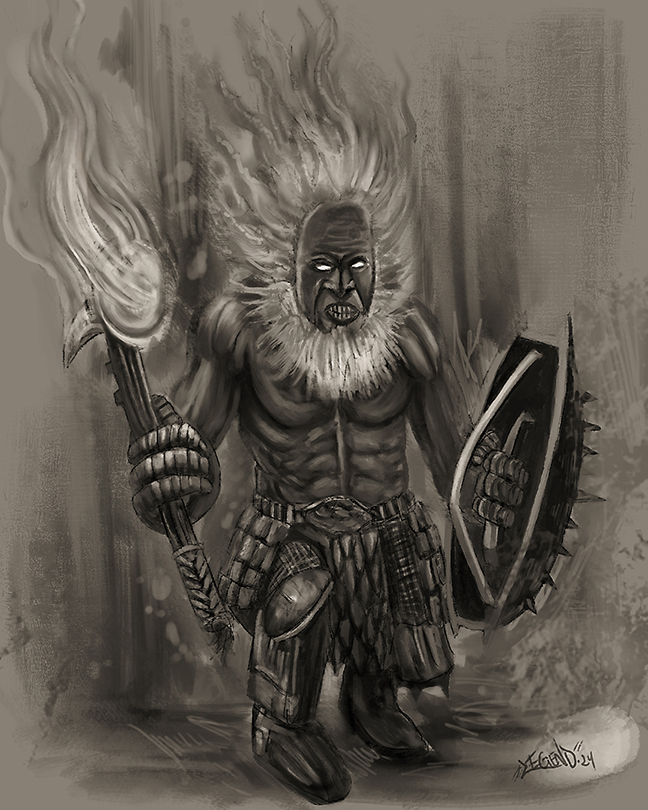
an Azer study.....

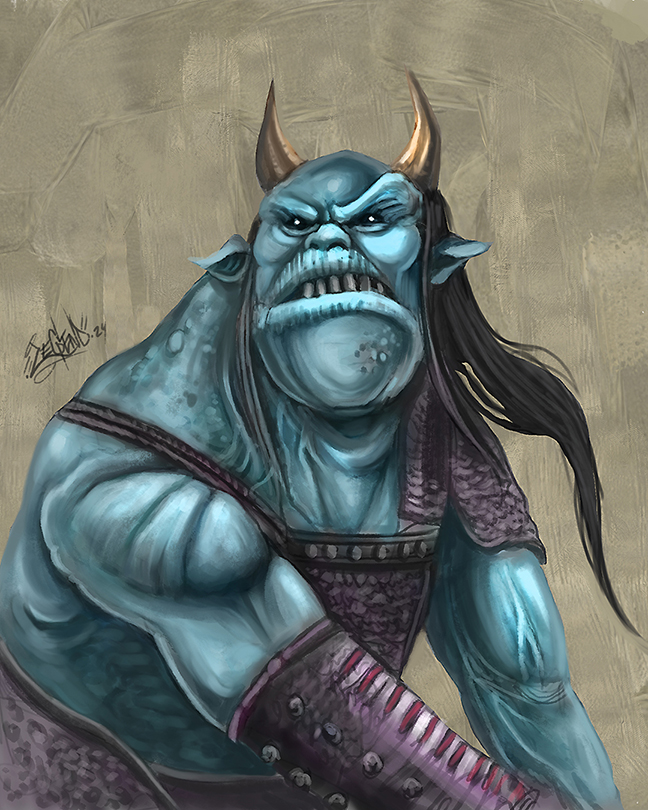
Ogre Mage study.....

RE: Crimson CHOW #57 D&D Sports Star - TrashPanda - 12-03-2024
Congrats Lege for the win and also for always commiting to the challenges!
I really dig the ogre mage design.
The brief was cool with plenty of freedom for unique settings.
I skipped on it because I try to focus on studying the basics, cause I realized
keyframe art,- character paintings are way out of my league at the moment.
However I always enjoy seeing what you guys came up with so I hope
you keep the "tradition" up of the chow challenges.
RE: Crimson CHOW #57 D&D Sports Star - Lege1 - 12-03-2024
Trash Panda: Thanks I guess, although I didn't consider things over yet was just waiting for CBinnsIllustration to update on what the deal was, he has been very busy in the times. I still have a final to post technically that is not seen here.
I'm very glad you enjoyed the studies. I was actually putting my own spin on some old characters found in the old D&D Monster Manuals, I have like all of them.
I think studying the basics is great, but you can learn a lot on the job, so you might have actually learned more jumping in the challenge and figuring out your dos and don'ts from there. I think that following the below work order of operations could really help you and if you have any questions feel free to ask.
1. Get an idea and thumbnail it out loosely and easily just for the sake of getting the idea out of your head, it doesn't have to be pretty.
2. Create a rough sketch based on the thumbnail of choice.
3. Then gather reference to try and better that rough and apply the reference accordingly where you feel necessary.
4. Once upgrading the rough sketch with your referenced additions for things like faces, hands, etc, drop the opacity of your rough drawing and create a new layer to draw over it cleaning it up more. It's up to you to do a third drawing or just keep with the second. Unless line work is going to be present in the final work it doesn't have to be clean if you're just going to paint over it.
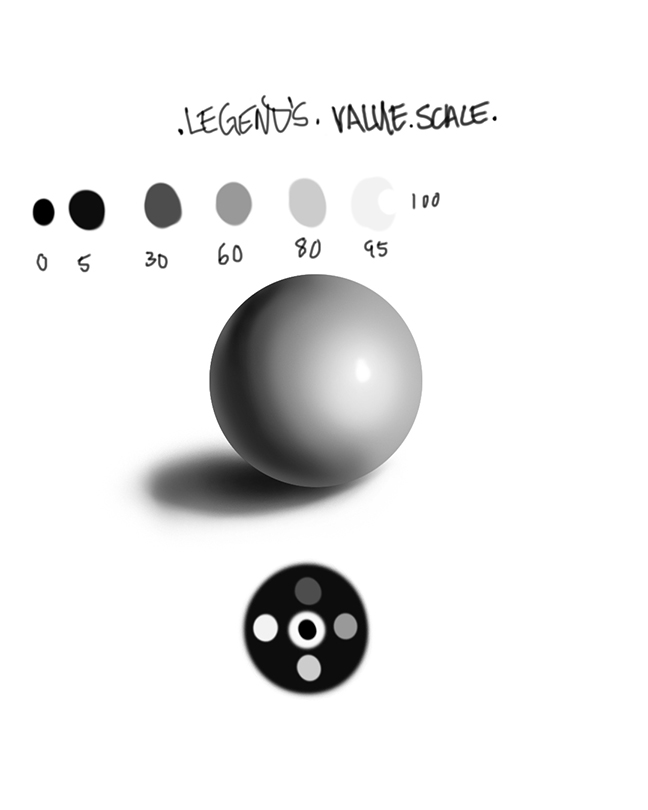
5. Apply values to your line work, it's your choice the hardness of your brush but I like doing this with a soft airbrush and erasing back where need be with a medium to hard brush, a simple round will do. Sometimes it helps to establish a light source first and then re-iterate on that once you get your shadows in. You can do this all under the line work of if you are working from a traditional sketch where everything is merged together you can create a multiply layer for shadows and simply use a screen layer for quickly adding your highlights over the sketch, and if you really want to get advanced you can look up tutorials on sketch lifting. I like to keep my value range in accordance to this chart. I typically start with a middle value as a mask to character or base and then work out into the shadows and then highlights, sometimes it does help to establish the light source first and re-iterate once shadows and such have been laid in. Really working with a mid-tone and shadows to get forms to read is a really great way to work cause once you add the highlights the image really reads well. So just two values starting off can go along way, for instance a 30% and 60% gray, then add some darker shadows and brighter highlights as needed. I save extreme black and white for the darkest areas and specular highlights of the image.

6. Once the values are set I go ahead and use my brush of choice, usually a charcoal, or chalk brush to massage the values to where the forms start reading, you are not rendering to final, but focusing on just the values in the beginning really helps speed up the process of the creating the image. Some people like to work in value and color and I can work that way too, but I prefer usually working from black and gray monochromatic image to just focus establishing my light sources and developing out my forms.
7. Once my forms are reading I proceed with adding color using transparent layer modes at different opacity settings. I usually start with a color layer, then proceed into overlay, and then experiment with other transparent layers as I feel necessary for whatever it is I'm trying to do with the image. I like using a soft airbrush to do this.
8. Once your colors are all laid in you can get to actually painting in color by color sampling from the colors you have laid down and focusing more on rendering and polishing the forms that you have already created in the early stages of this process. You can experiment with adding textures and such in places like the highlights and so forth. The idea at this stage is to have fun and really start bringing things to a finish, but do not smooth things out too much in this stage which can be tempting. Continue pushing and pulling the image laying down paint and using the sample color blending technique as you go along. This is why I like the chalk or charcoal brushes cause you can create hard edges while also doing some medium blending along the way.
9. This is the stage to make any final lighting adjustments or effects like using the dodge or burn tools, or an overlay layer where you use shades of gray to adjust the lighting, 50% is the magic area and anything above or below is either lighter or darker. You can apply color balance for a shift in your work or experiment with transparent color layers over the whole image in an attempt to make everything more harmonious.
10. This is the final rendering stage where you are adding in details with your tapered brush and then getting into doing softer blending or smoothing of the image in places, but be careful when doing this cause it is easy to blend away all your interesting brush work, and also try to stay away from using the smudge tool as it tends to desaturate and muddy things, use it very sparingly if at all. I typically use the smudge tool only for special effects, and this is referring to working in photoshop....other programs like Procreate and others it is absolutely necessary and more functional to use the smudge tool. I tend to do a lot of my soft blending with a soft airbrush with wet edges option on and the flow or opacity set low. Flow set low is a more solid blend where lowering just the opacity creates a finer blend.
11. This is the post editing stage where you might want to do things like adjust your levels, add noise to the image, sharpen the image, blur in places, etc.
Some additional tips:
*Keep in mind this is what works best for me most of the time but everyone is different. Instead of using line work to do your sketch work via linear, you may be more comfortable blocking things out roughly with paint and erasing back as if you were sculpting with clay and so forth. I personally prefer line work because it is more expressive and when you are doing things volumetric you still have to go back into the silhouette and add in all the little details of things.
*Stay zoomed out for the majority of the image, I typically stay zoomed out at about 25% the majority of my whole image, come in 50% here and there, and only zoom in at 100% for very detailed areas.
*Keep your main workhorse brushes simple. You can do the whole image with one to three brushes, so don't let brush selection mess you up or scramble your brain unless you are going for a specific look in the work that someone else has already established, then brushes matter, but if you are not looking for a specific look in the work to the likeness of someone else's work then brushes don't matter and you need to focus more on the settings of how that brush feels for you when you paint with it, along with how it is looking laying down paint and blending some as you move along through the image. Also, use larger brushes to begin and establish the foundation of the image which can also help give the image a looser look, and then use medium to smaller size brushes as you start to finalize the image.
*Have fun and let loose, if you just let go and have fun with what you are doing that energy will show in the work overall. If you are all tight ass and stressed working on the image then that is going to show in the work also. Just fall back on the foundational elements and enjoy the journey and usually something good to great will come out of it. The more you fall back on foundation and execute that properly in the work, the better the images are going to get. Don't be afraid to just let go and enjoy yourself.
There is a bunch of other stuff I could write but this all should do for now. I'm hoping this can help you and whoever else's prying eyes might be on this forum who prefer to extract value only from this forum opposed to adding to, or people completely new to all this to get some type of foundation as all of the above has definitely helped me a lot. 100
RE: Crimson CHOW #57 D&D Sports Star - CBinnsIllustration - 12-03-2024
Sorry ya'll for slacking in getting a finals thread up for this challenge! life got a bit busy lately and i havent had any time for fun this month. I dropped a Finals thread for posterity mostly as the win is most certainly Lege's who held the torch for all us slackers this go around. I dont like missing these so it hurst to not even have a WIP :-( but i will do better next time of what is sure to be a great Brief from our Winner Lege!
@Lege be sure to post your final in the thread and we can close the poll and can get us rolling with a new topic.! nice work on all the studies also, i especially like the Ogre Mage!
RE: Crimson CHOW #57 D&D Sports Star - Lege1 - 12-03-2024
CBinnsIllustration: Thank you so much on the kind words bro and no apologies needed; life happens. Much love and better luck next round....tried to choose a good topic that everyone might take to; followed your D&D fantasy lead =) I'm glad you liked the studies....been experimenting some.
-=TO ALL THE NEW CHALLENGE IS UP!!!
RE: Crimson CHOW #57 D&D Sports Star - TrashPanda - 12-04-2024
Thanks man for taking your time to write down the detailed breakdown of your workflow!
Someone should pin it so this gets more recognition. Going through it
showed me where I am actually stuck at the moment.
Somewhere between step 3. and 5. is where I have the most struggles.
I tried to avoid too many references after cleaning up a sketch. With values
I felt pretty lost after using 2-3 values to seperate front,mid and background elements
and the overall graphic read of the comp. After adding more values to give the piece
more complexity is where my value structure fails hard.
I guess declaring a high or low key value range first is probably the way to go
to not get lost.
Btw dope briefing for the last chow classic fantasy themes are always nice.
So keep up the good work
RE: Crimson CHOW #57 D&D Sports Star - Lege1 - 12-05-2024
TrashPanda: Absolutely and you're very welcome. Try to keep things simple, that's my best advice. We tend to over complicate everything as human beings. When it comes to referencing there are very many ways to use it, so you may want to put some focus on how to reference more and the various ways. Here are some of the ways that I use most in referencing, which I don't reference as much as I probably should because I'm stubborn and like to draw mostly from imagination:
1. Direct Referencing: Where you copy your reference exactly.
2. Cross Referencing: where you reference various images and parts of them to make a new one.
3. Light Source Referencing: Where you take the light patterns from a character in similar pose to what you have drawn from imagination or another reference and apply that lighting scenario on to the drawing. Most pose angles are going to be front, side, or 3/4 view.
Keep it simple starting off with the values and see if that helps you. Just start with 60% gray (mid-tone) as your base, and add shadows using 30% gray (darker mid-tone); work those two together under your line work till the forms start to read. You can always establish a light source first using 70% gray. I reserve 80% gray as my primary light source and 95% for my brighter light source like rim light or bright lights; anything about 95% is more in the specular highlight range and should be used sparingly.
Give it a try and see how it works out for you. You can always change up things how you'd like but all I'm trying to give here is some basic foundation and show the way I like to work and how I think of my values to keep things simple and work my way up.
Thank you and I'm glad you like the new prompt, I always try best to bring something new an interesting that everyone will enjoy for the sake of keeping our participation levels up and this forum alive.
RE: Crimson CHOW #57 D&D Sports Star - Lege1 - 08-11-2025
Relevance post to stay ahead of spam on this site.