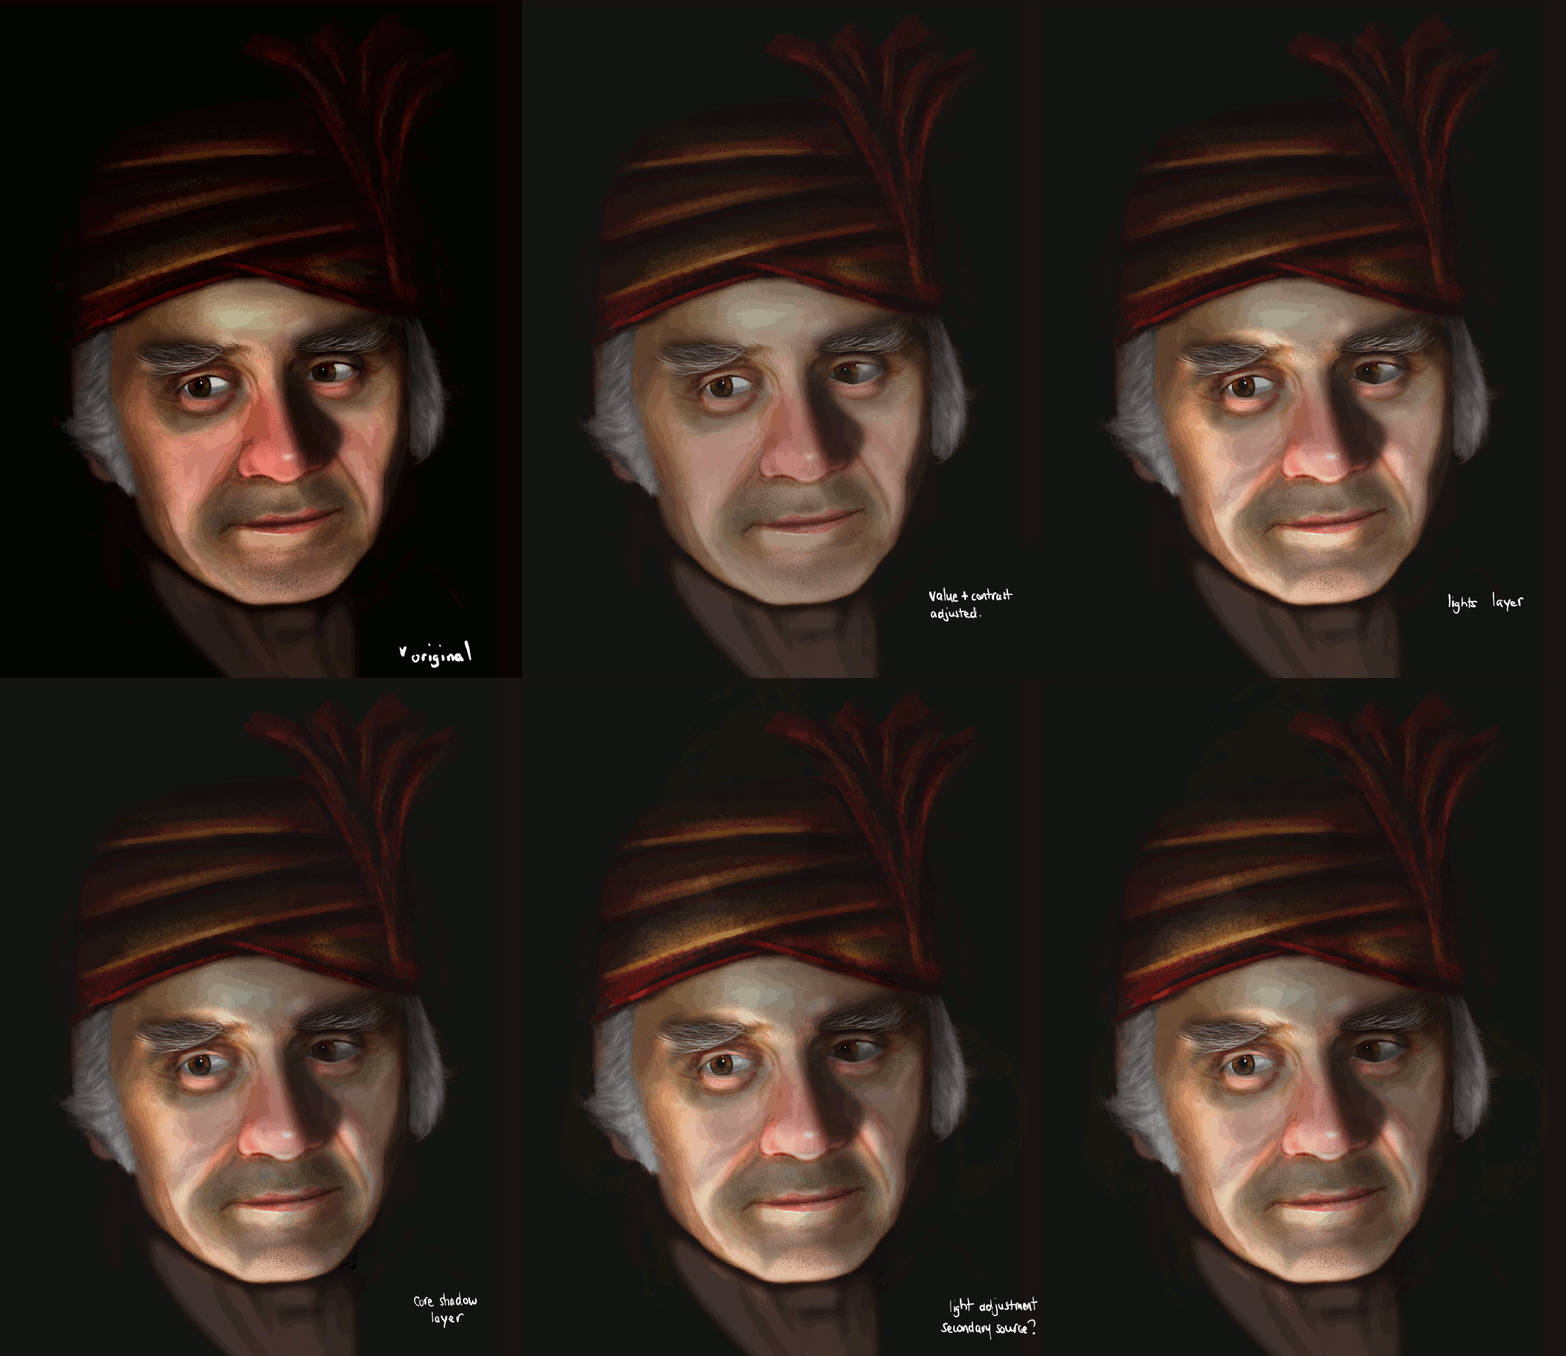
No worries, sorry I didn't actually explain what I did to get the effect! It was very simple. Here's a gif (apologies for the dithering...not sure how to optimise the gif well or if it's even possible for this type of image). Each transition is literally the addition of one extra layer on the base image.

Values Adjusted Layer: This was a 'normal' layer. I duplicated the painting and curved the entire thing because I found the original image too contrasty. Funnily I thought I would have to do something about the saturation too, but the values adjustment simply fixed it.
LIghts Layer: This was a 'normal' layer. I duplicated the entire values adjusted layer, used curves again to bring out the high values so that it looked like light was shining on it. Then I masked out and painted in the light where I wanted.
Shadows Layer: Same as before, except instead of curving for higher values, I curved for lower values to get a nice core shadow value. Then, masked and painted in shadow areas as I wanted. This layer ended up being on 'Multiply' and lower opacity. Just play around.
Additional lights: Again a duplicate of the values adjusted base layer. Curved to be a higher value. Set to 'Screen'. Then masked and very softly brushed in the light. I didn't go overboard with this step, but you can use this to do your secondary source if you wanted it stronger.
That's it. Four layers, mostly just adjustments, layer meddling and mask painting! By duplicating the base layer each time and doing adjustments and mask painting it is very easy to make changes and try out different things. If you want green light, just colour balance the light layer...etc etc. Of course you will have to go back in directly at some point but it is a totally non-destructive way of experimenting.. Hope that helps!
![[Image: dieter_by_wolkenfels-d6u8fv1.jpg]](http://fc02.deviantart.net/fs70/f/2013/318/f/8/dieter_by_wolkenfels-d6u8fv1.jpg)
![[Image: dieter_by_wolkenfels-d6u8fv1.jpg]](http://fc02.deviantart.net/fs70/f/2013/318/f/8/dieter_by_wolkenfels-d6u8fv1.jpg)


![[Image: dieter2_by_wolkenfels-d6uhaxe.jpg]](http://fc01.deviantart.net/fs71/f/2013/320/2/3/dieter2_by_wolkenfels-d6uhaxe.jpg)
![[Image: dieter4_by_wolkenfels-d6ul9u7.jpg]](http://fc04.deviantart.net/fs70/f/2013/321/7/4/dieter4_by_wolkenfels-d6ul9u7.jpg)


![[Image: dieter_by_wolkenfels-d6ur5un.jpg]](http://fc08.deviantart.net/fs70/f/2013/322/b/e/dieter_by_wolkenfels-d6ur5un.jpg)
![[Image: sor_by_wolkenfels-d6uuwc5.jpg]](http://fc02.deviantart.net/fs70/i/2013/323/c/2/sor_by_wolkenfels-d6uuwc5.jpg)